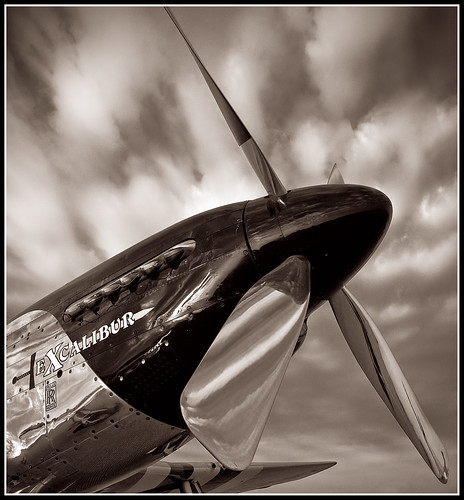
This is a shot of a P-51 Mustang taken at the 2007 Thunder Over Michigan air show held at Willow Run Airport in Ypsilanti, Michigan. This show is held annually and proceeds go to suppor the Yankee Air Museum. In 2007, the featured plane was the B-25 'Mitchell' Bomber, but there were plenty of other vintage aircraft participating as well.
Even though this shot was taken last summer, I hadn't really done much work on it. I liked the basic composition, but I wasn't able to come up with a finished image that I really liked. I took another stab at it recently, and the result is what you see above.
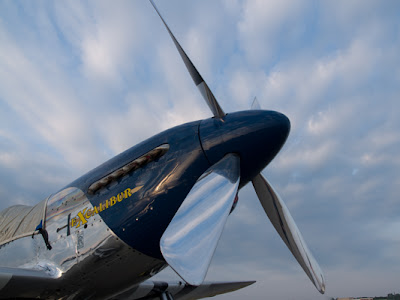
The image to the left is what the image looked like coming out of the camera. I took this with an Olympus E-500 which captures images in a 4/3 aspect ratio. I didn't feel that the covered canopy and content on the right side of the image added much, so I cropped the image in Camera Raw before opening the image in Photoshop.
As you can see, the original was in color. The shot was taken in early morning and we had some nice clouds in the sky. I liked the shape and texture of the clouds and I wanted to make sure that was retained in the final image. I also liked the glassy look of the plane and the propellers and wanted to maintain that as well.
I tried several different types of post processing. I tried it in color, using curves to add contrast. I played with the color saturation and other elements. I finally decided that black & white worked the best, but had trouble with the bottom propellers disappearing into the sky. I decided to try an experiment where I would exaggerate some of the colors so that I would be able to lighten/darken them when I converted the image to black and white.
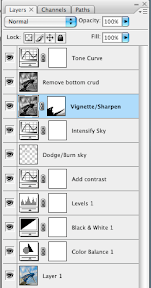
From the layers palette shown at right, the main things I did with this image were (from bottom to top):
- Enhance/Exaggerate colors using some LAB curves and a color balance adjustment layer
- Convert to black & white, driving blue darker and yellow/red lighter
- Do some work on the sky via curves, levels, dodge/burn, vignette
- Add a simple tone curve at moderate opacity
In an attempt to have more control over the black & white conversion, I decided to see what would happen if I strengthened and enhanced the basic color before moving to black & white. Conceptually, I figured, this was no different than putting a colored filter on the lens when shooting black & white film, but with more control. The first image below was the result of converting the image to LAB mode and steepening the A and B curves. The second image was the result of manipulating the color balance of the image a bit more.
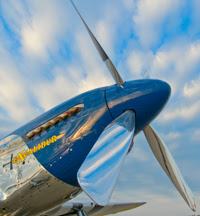 |  |
The rest of the processing mostly involved working with curves or levels to increase the drama in the sky. I created a dodge/burn layer set to Soft Light and did a little painting on the sky to darken or lighten portions of the sky. I used a low opacity brush so I could have better control over the process. I then added a vignetting layer using the Lens Correction->Distort option. I didn't want the plane to be too dark so I used a masking layer to remove the vignetting from the plane and lower propeller. The final piece was to add a subtle tone curve to the image. I reduced the opacity of this layer to about 50% to reduce the overall effect.
Comments, constructive criticism and suggestions are all welcome.