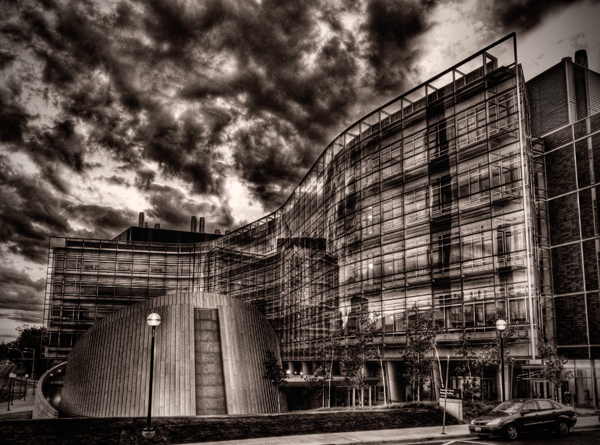
This image is of the Biomedical Sciences Research Building on the campus of The University of Michigan in Ann Arbor. I took this shot last summer (2007) as a series of exposures with the intent of creating an HDR. However, when I processed the multiple exposures I wasn't particularly happy with the way it came out. I didn't find any one of the series of images to be particularly compelling, although I did like the cloud formations. I decided to try some experimentation to see what I might coax out of the image. The building is an interesting structure, particularly the auditorium which is located in front of the building. Some people refer to this building as the 'pringle', in reference to Pringle's potato chips. I think this building has a slightly alien look to it, so I tried to create an image which had a 'otherworldly' feel to it.

The image to the left is the raw, unprocessed image. It is relatively flat, but has some potentially interesting color and texture in the clouds. I wanted to use something which would bring out the texture and shape. There is also some detail in the building itself but it is hidden in the dark.

In the layers pallette you can see that the number of processing steps was minimal. Since I had originally tried to create an HDR from multiple images, I decided to see what I could do if I used the Photomatix tonemapping plugin for Photoshop. I opened the plugin as a smart filter so I could go back later and make adjustments if I wanted to. The remaining steps were designed to improve the contrast just a bit, add some additional texture and tone.
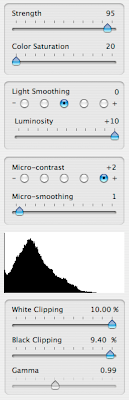

Above you can see the settings I used in the tone mapping plugin and the effect it had on the image. I used a high strength setting but desaturated the entire image. I wanted to bring out some of the light areas of the image so I set the light-smoothing to a mid value and luminosity to it's highest setting. In the contrast settings I wanted enhanced detail so I selected a high micro contrast, but I liked the look with the micro-smoothing set low. Finally I played with the white/black clipping levels to get an image that had the brightness levels I was looking for.
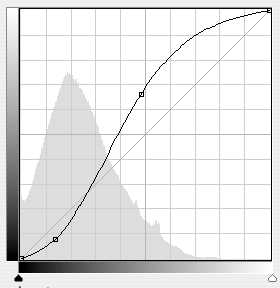
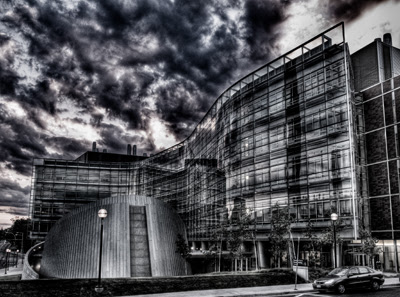
After finishing with the tone mapping I still didn't like the overall contrast in the image. I added a curves adjustment layer to get just a little more punch to the image. You can see the curve I used and the resulting change to the image above. After the curves layer, I made a minimal correction to the exposure and then put a true black and white layer since the tonemapping left just a bit of color in the image. I finished this particular image off with a 'platinum' toning curve (below) and a vignette to darken the edges.

As always comments, questions and constructive criticisms are welcome.
All images Copyright © 2008 James W. Howe
This image is available for purchase in my Color gallery on ImageKind.


No comments:
Post a Comment