(Olympus E-3, 14-54mm lens at 20mm (2x crop factor), ISO 400, exposure 1/15 sec @ f/8)
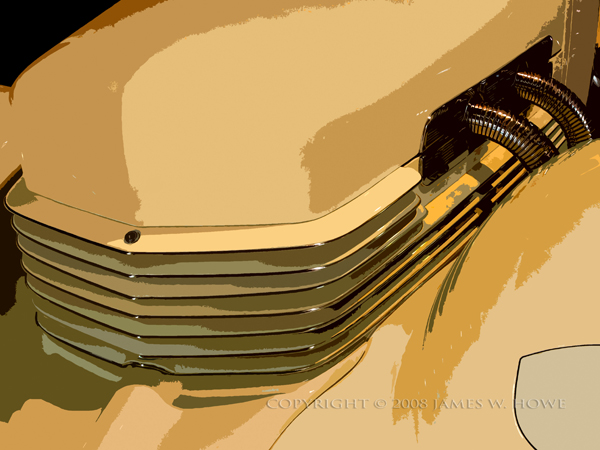
Sometimes when I find myself in a creative rut I revisit previous images that I have taken to see if there is something new that I can do with them from a post-processing standpoint. The image above is one such example. The image came from a photography I made of a 1937 Cord 812 Beverly Sedan. The car was on display at the Gilmore Car Museum. Shooting in a museum is always tricky. You have lighting in the buildings which creates hot spots on the car, sometimes the lighting is dark, or other problems exist. For this image, the lights created hot spots on the car, there was a window just behind the car, and the overall lighting was sort of dark. I really like Cord automobiles, but I have never had a finished shot that I really liked. I'll sometimes get good compositions, but other aspects of the image don't work for me. In the case of the image above, I liked the composition, but I didn't like the way the lighting worked, so I didn't put any more time working on the image.

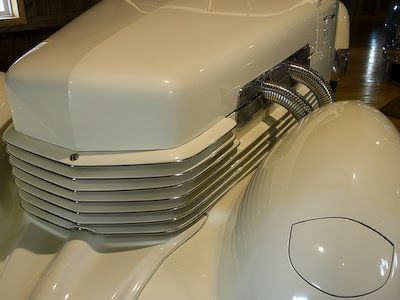
The image above is the 'as shot' image of the Cord. If you look to the left, you can see a window in the image, on the right there is light from another window reflecting off of the floor. In addition, there are little hot spot lights reflecting off of the car itself. As a 'regular' image, I just don't think this image works. However, I still liked the look of the shot. I think I like Cord's because they have a very angular design. They have interesting lines and details. If I could find some way to emphasize those features, I figured I might have a good image. Turns out that Photoshop had a filter which worked perfectly, I just didn't realize it existed!
Even though I use Photoshop on a regular basis, I tend to focus more on it's digital darkroom tools such as curves, levels, etc. I don't often venture into the more artistic filters. In general, I prefer to create photographs rather than photographic or digital art. However, it doesn't hurt to experiment. The other day, I was playing around with a new noise reduction tool. I found that when I used some extreme values I got an interesting result. Based on that experimentation, I decided to try some of the standard Photoshop filters. I ran across one that I had never used before called Cutout.
Cutout is interesting because it lets you create images which sort of look like maybe they were printed using wood block technology. You can dramatically limit the number of colors in the image, and you can play with how the edges in the image are rendered. Using different values you can get a complete abstract image if you want, or you can get something more like Andy Warhol. I found that by using this filter on images with some complex edges and colors, you could get some really cool results. I used this filter with varying settings on a variety of images. On some the effect was pretty useless, but on some of my detail shots, particular of mechanical items, the results were very pleasing.
On the image above, I used Cutout to create a highly posterized version of the image. I liked the way the color gradients came out. Because of the simplification of the color, I was able to go in and paint over the more annoying light spots. I also took out the side window as well. I could never have done this with the regular image using the clone tool because the colors were just too complex and the result would have look horrible. Some expert cloners might have been able to do things, but not me.
After getting the basic image where I wanted it, I increased the saturation a bit and added some additional contrast. I didn't need to do any sharpening, because the filter altered the image enough that sharpening would have been pointless. I simply saved the image with the end result that you see at the start of this posting.
Comments welcome.
Text and images Copyright © 2008 James W. Howe


