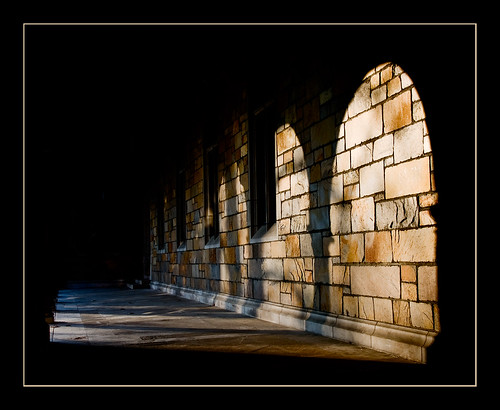
This is a shot taken of a walkway in the Law Quad at the University of Michigan in Ann Arbor. The shot was taken mid-morning, so the sun was entering the space from the southeast through a series of arches. I really liked the strong image that was cast on the stone wall and I took several shots at varying exposures. Originally I had thought about making an HDR, since the brightness range was so great, but when I took at look at the individual images, I decided that I really liked one of the darker images. The darker image almost had a big black border around it just by nature of it's exposure, and I though the contrast between the dark border and the brighter areas made for a striking image. For me, the way the light and shadow fall on the wall I almost feel like I'm looking at stained glass windows.

The image to the left shows the same shot, but one of the lighter images that I took. You can see additional detail in the ceiling, a light hanging down, the wall on the left, etc. This image does a better job of showing what the walkway looked like when I was there, but it lacks some visual impact.
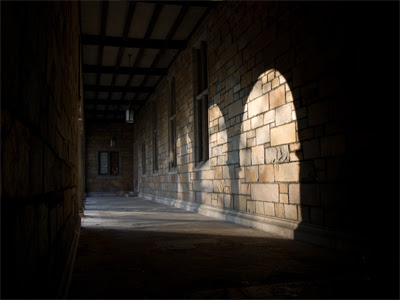
The image to the left is the unprocessed version of the image that I used to make the finished image. As you can see, it is much darker. The most visible element is the light falling on the stone wall. You can still see some of the ceiling as well as the lights hanging down and a bit of the wall on the left side. My basic plan with this image was to darken the parts that were already dark and add a bit more contrast and color to the lighter elements.
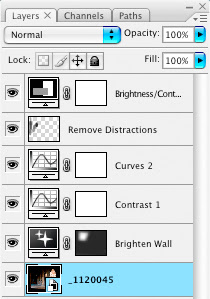
To the left you can see a screen shot of the layers palette taken from the Photoshop file which produced the final image. The first thing I did was to add an exposure adjustment layer. This made the wall a little brighter, but it also brightened the darker elements, which I didn't want. I applied a layer mask to limit the exposure correction.
The next step was to apply a couple of curves adjustments. the first added a simple S curve to improve contrast. For the second, I simply made the whole image just a bit darker.
I then added a blank layer which I used to remove the elements of the image which I didn't want to appear. This included removing the hanging lights, eliminating any visible ceiling and finally I removed any visible wall elements from the left side. This left the light on the ground as well as the light areas on the right side. After this, I made a minor brightness/contrast correction.
After making the above corrections, I flattened the image and converted from RGB to LAB mode. I applied a simple curve in the A and B channels to bring out a little more color in the stone and then reduced the overall opacity. After sharpening, I cropped the image and added a simple frame. For the light portion of the frame, I picked a color from one of the stones.


3 comments:
I was on the Radiant Vista site and came across your post and the link to the blog. I really appreciate not only the photography but your sharing of your Photoshop skills. I look forward to reading more posts.
Awesome!
This week I'm working on an photo assignment for class focusing on Architecture. I was planning on visiting the law quad as well. I'll keep your pictures in mind!
Post a Comment