Showing posts with label E3. Show all posts

Tuesday, February 12, 2008

Molecule

Molecule


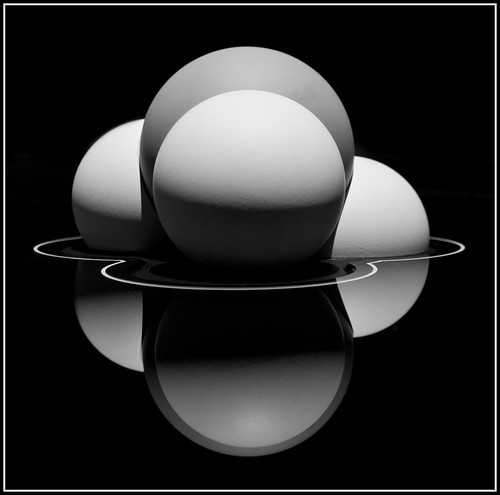
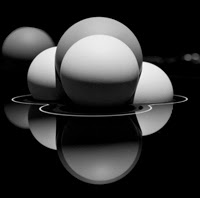
This shot was taken at the 2008 North American International Auto Show in Detroit, Michigan. This is a picture of an exhibit at the Mercedes booth. I believe this had something to do with their 'Bluetec' technology. I didn't pay much attention to what the exhibit was talking about, I just thought the object made for an interesting image. I liked the shape of the objects and the way they reflected on the table top. Since this was on an exhibit floor there were plenty of overhead lights and plenty of background elements to be concerned with. I took the shot using a narrow depth-of-field, but I couldn't do much about the lighting when I took the shot. After I looked at the image when I got home, I thought that it would work best in black and white and in a square format. I cropped the image to create the square image and enhance the symmetry.


What you see here is the image as it came out of the camera. This was shot with an Olympus E-3 using the 14-54mm lens. This translates to a 35mm equivalent focal length of 28-108. I shot this at 31mm (62mm) and f3.2 to create a shallow DOF. As you can see in the original, there isn't much color, and what color there is comes from the background which creates a distraction. There was another 'molecule' just behind this one which I also didn't want in the image, but I couldn't arrange the shot to avoid it.
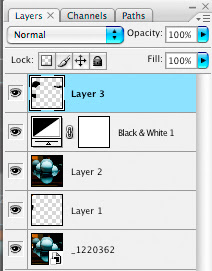


This is the layers palette from my processed file. The processing was fairly simple. The first layer had some initial processing in Adobe Camera Raw and was cropped to a square format. A couple layers exist simply to clone out items that I didn't want to see, and a layer to convert to black and white.
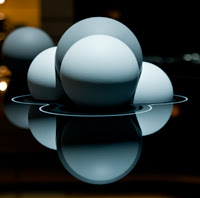


To the left you see the image as it came out of Camera Raw. It was cropped before being opened as a Smart Object in Photoshop CS3
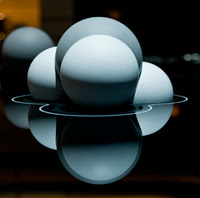


In the original image there was a very bright spot on the left caused by a ceiling light which was reflecting off of the table. Its proximity to the 'molecule' was very distracting, so the first thing I did was to clone out this element.


I then converted the image to black and white and took that opportunity to drive the background darker. I then added a new layer which I used to clone out the background elements.


From this point, the last thing to do was clone out the background molecule and any remaining distracting elements, sharpen and add the border to the image. The final result is what you see at the top.

Sunday, February 10, 2008

Law Quad Walkway

Arches

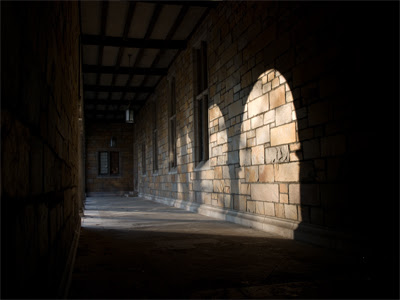
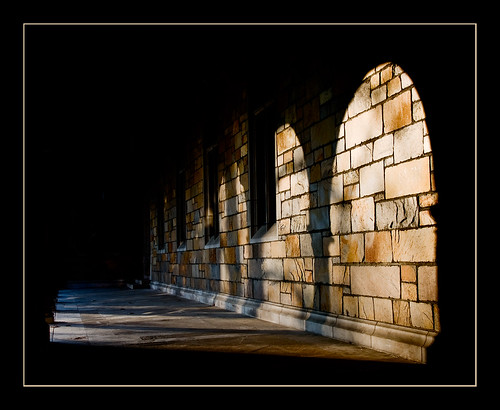
This is a shot taken of a walkway in the Law Quad at the University of Michigan in Ann Arbor. The shot was taken mid-morning, so the sun was entering the space from the southeast through a series of arches. I really liked the strong image that was cast on the stone wall and I took several shots at varying exposures. Originally I had thought about making an HDR, since the brightness range was so great, but when I took at look at the individual images, I decided that I really liked one of the darker images. The darker image almost had a big black border around it just by nature of it's exposure, and I though the contrast between the dark border and the brighter areas made for a striking image. For me, the way the light and shadow fall on the wall I almost feel like I'm looking at stained glass windows.


The image to the left shows the same shot, but one of the lighter images that I took. You can see additional detail in the ceiling, a light hanging down, the wall on the left, etc. This image does a better job of showing what the walkway looked like when I was there, but it lacks some visual impact.


The image to the left is the unprocessed version of the image that I used to make the finished image. As you can see, it is much darker. The most visible element is the light falling on the stone wall. You can still see some of the ceiling as well as the lights hanging down and a bit of the wall on the left side. My basic plan with this image was to darken the parts that were already dark and add a bit more contrast and color to the lighter elements.


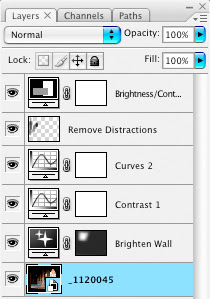
To the left you can see a screen shot of the layers palette taken from the Photoshop file which produced the final image. The first thing I did was to add an exposure adjustment layer. This made the wall a little brighter, but it also brightened the darker elements, which I didn't want. I applied a layer mask to limit the exposure correction.

The next step was to apply a couple of curves adjustments. the first added a simple S curve to improve contrast. For the second, I simply made the whole image just a bit darker.

I then added a blank layer which I used to remove the elements of the image which I didn't want to appear. This included removing the hanging lights, eliminating any visible ceiling and finally I removed any visible wall elements from the left side. This left the light on the ground as well as the light areas on the right side. After this, I made a minor brightness/contrast correction.


After making the above corrections, I flattened the image and converted from RGB to LAB mode. I applied a simple curve in the A and B channels to bring out a little more color in the stone and then reduced the overall opacity. After sharpening, I cropped the image and added a simple frame. For the light portion of the frame, I picked a color from one of the stones.

Saturday, January 26, 2008

Buick Riviera Concept Car

Buick Riviera Concept

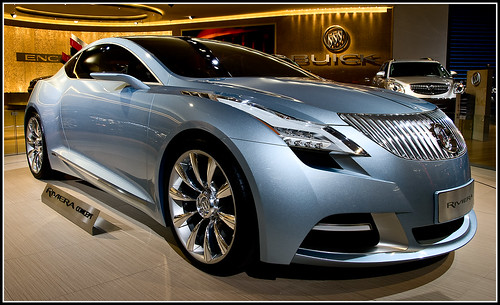
This is a shot that I took of the Buick Riviera Concept car which was on display at the 2008 North American International Auto Show in Detroit, Michigan. The organizers of the show set aside an hour one morning for photographers. If you had a camera, you could get in an hour early to take pictures before the crowds started arriving at 9 am. This made it much easier to take shots of the cars without worrying about people getting in your shot.

This particular image was somewhat of a challenge to take. The car itself was on a rotating platform which meant that the shutter speed had to be fast enough to prevent blurring. There was also a short glass wall around the platform which limited the angle at which you could take the shot. For this shot I used my 14-54mm telephoto set to the wide end. My Olympus E3 is based on a four-thirds sensor, so 14mm is equivalent to a 28mm lens on a 35mm camera. I wanted to get close to the front of the car and shoot along the side to give a feeling of power and drama.

The processing on this shot was fairly minimal. It consisted mostly of making some adjustments in Camera Raw, a mild curves adjustment in Photoshop, some sharpening and then adding a layer which darkened the areas surrounding the car in an effort to draw more attention to the car itself.

To the left is the image as it came out of the camera. It was shot in raw, so this image was created by simply opening the image and saving it as a JPEG without any processing.


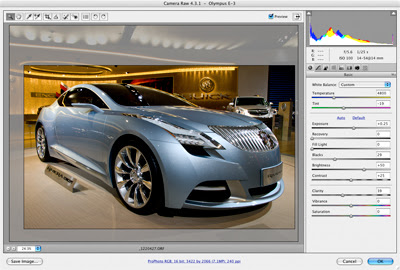
The image below is a snapshot of the Camera Raw file settings used for this image. The first thing I did was to crop the image a bit. I didn't like the ceiling lights and I wanted to focus more on the car. Had I been able to this in-camera, I would have, but I wasn't. If you look at the settings on the right side, I made some minor changes to the white balance and increased the blacks up to 29 or so and up the clarity setting. From here I took the image into Photoshop where I adjusted the contrast, did some sharpening and added a vignette layer.

For the vignette, I created a New Layer and selected 'Soft Light'. I clicked the 'Fill with 50% gray' option and then painted on the new layer with a dark brush. I decreased the opacity on the brush so I could better control the effect. Once I was done, I reduced the overall opacity of the layer to about 53%.