This image was taken at Taliesin, the Wisconsin home of Frank Lloyd Wright. The sculpture in the picture is known as "The Flower in the Crannied Wall", and is a copy of a sculpture done for another of Wright's houses. This particular sculpture used to be displayed in a more exposed area and as such suffered damage, particularly to the arms. The sculpture was moved to a more sheltered space several years ago.
I took this image while on a tour of Taliesin, and as such I didn't have a lot of time to spend composing my shot. I also was pretty much stuck with whatever lighting there was. Fortunately the tour took place in mid-afternoon, and it happened that the sun was coming through a doorway right behind the statue, creating some nice lighting on the stone. The angle and intensity of the light made for a difficult exposure. When I took the shot, I was thinking that it would make a nice black & white image. However, once I starting working with the image, I felt that a slight sepia tone would fit it better. What follows is a basic description of how I went from the unprocessed image file to the one you see above.
Straighten and Repair
In working with the image, the first thing I did was open the image in Adobe Camera Raw 4.1. I did some mild exposure related changes to the image, but the biggest changes were to straighten the image and to do something about the open doorway above the head of the statue. Straightening the image was fairly simple. I used the ACR straighten tool and drew a line across the bottom of the statue. This resulted in a slight rotation of the image which made everything look a little better.
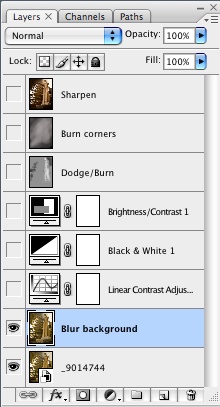
In order to get rid of the open doorway, I used the clone tool of ACR to copy portions of the wall to the area where the doorway was. The clone tool in ACR is quite nice, you create a circle around the area you want to replace and ACR finds another area of the image which it thinks matches. You can move the suggestion around, and as you do you see how the clone will look in real time. I ended up doing several clone actions to block out the doorway. Fortunately, the wall itself has a sort of rough plaster coating and the clone ended up doing a fairly good job. Once this was done, I opened the image as a Smart Object in Photoshop CS3. The clone left some artifacts and I cleaned this up somewhat by creating a new layer and using the Blur tool to blur out the artifacts.
 |  |
 |  |  |
Add Contrast
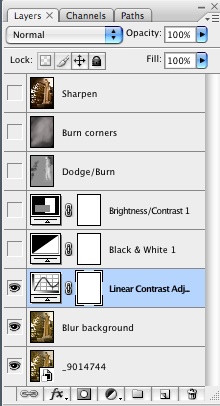
After cleaning up the wall a bit, I experimented with adding a little contrast to the image. After some experimentation I decided that using the preset 'Linear Contrast' (in CS3) gave me the best look. This option creates a very shallow S curve.
 |  |  |
Convert to Black & White
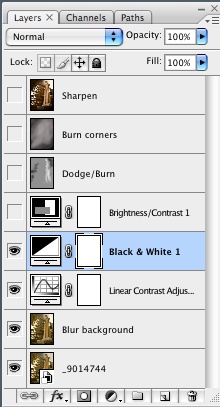
The next step involved converting the image from color to black & white. I used a Black & White adjustment layer and adjusted the sliders to get a look I liked. Mostly I darkened the upper left and lower right corners and tried to lighten the statue up a bit. I used the feature in CS3 which lets you click on an area of the image and drag left or right to darken or lighten the pixels which are in the same color range. As a final step, I used the Tint option to add a slight sepia tone to the image. The color version was already almost sepia and I liked the slight tone better than a straight black & white.
 |  |  |
Tweak the Brightness & Contrast
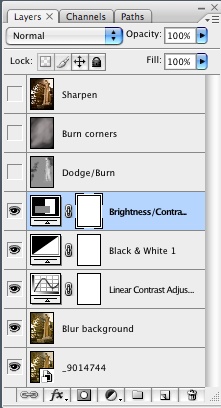
After the conversion to black & white I still wasn't completely happy with the contrast in the image. I decided to try the Brightness and Contrast adjustment layer to add just a bit more of each to the image. I think the change brought out just a bit more detail in the statue.
 |  |  |
Dodge and Burn
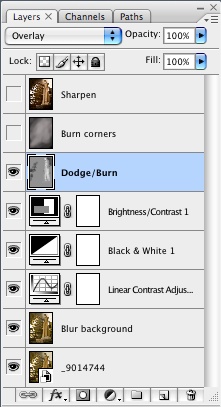
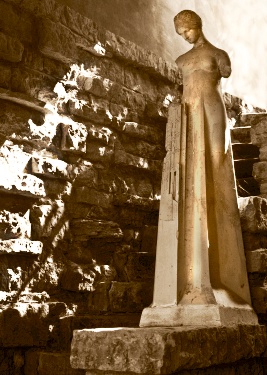
At this point I thought that some of the areas of the image were too dark. In order to lighten them, I created a dodge and burn layer. I used a technique that I found described in Scott Kelby's book, Photoshop CS2 For Photographers. I created a new layer by selecting New Layer from the Layers menu. I chose the Overlay blending mode and selected the 'Fill with 50% gray' option. I then selected a soft brush and set the opacity fairly low, maybe around 15%. I would select a white brush for places I wanted to be lighter, and a black brush for areas I wanted to darken. Since the opacity level was low I could control the amount of the effect by making multiple passes over the image. If you look at the Layers Palette, any area which isn't mid-gray received some treatment. Light areas were made lighter (dodged), dark areas were made darker (burned). If you look closely, you will see that the statue was made a little brighter, and a spot on the wall where the sun was hitting the hardest was made a little darker.
 |  |  |
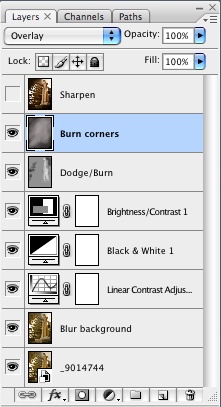
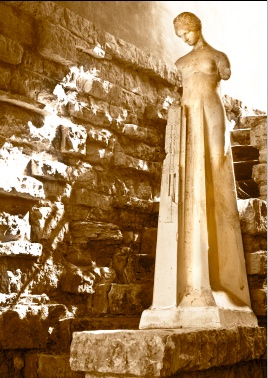
I was happy with how the statue and the sunny parts of the wall were looking for the most part, but I wanted to strengthen the contrast between the sunlit parts of the wall and the more shaded areas. I wanted to really emphasize the light which was coming in behind the statue. To acheive this, I created another dodge/burn layer and this time I did some additional burning in the upper left and lower right corners. Again, if you look at the Layers Palette you can see the areas that received burning or dodging.
 |  |  |
Creating the 'Orton' Effect
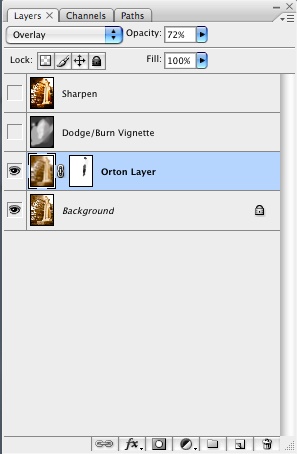
The next step involved adding an 'Orton' effect to the image. This technique was originally developed for use with slides, where a slightly overexposed slide would be combined with a blurry slide to create an image with bolder look. Using a technique described here I tried to do the same thing for this image.
The first step involved taking the image and duplicating it. After duplicating it, I used 'Apply Image' with an overlay mode of Screen to create a slightly overexposed version of the image.
Once I had my overexposed image, I created a duplicate of the overexposed image. This duplicate was my blurry image. I used a Gaussian blur on the image with a radius of about 50. Once I had the blurred image, I used the Move tool (V) and did a shift-drag of the blurred image onto the overexposed image. I also switched the blend mode to Overlay.
For the most part I liked the Orton effect, but I didn't like the way it reduced the sharpness of the statue itself. In order to counteract this, I created a layer mask to remove some of the effect over the statue area. If you look carefully at the mask, you can see the areas where I masked out the Orton effect.
 | 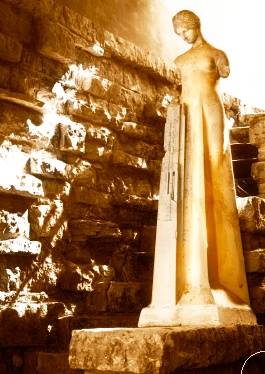 |
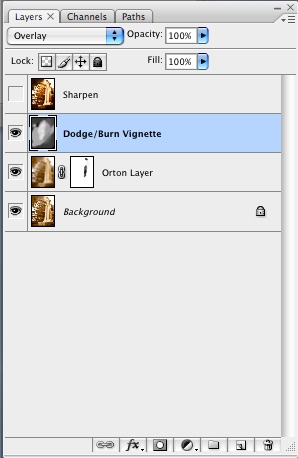
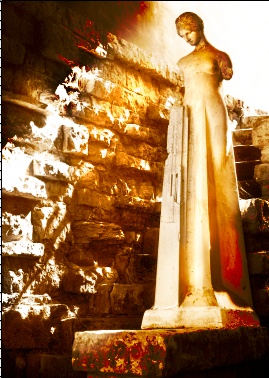
I still wasn't quite satisfied with the look. I wanted more of the focus to be on the statue, so I added a Dodge/Burn layer, using the technique described earlier, and darkened areas around the statue to create more of a vignette. If you look at the layer mask, you can see the areas that I darkened and those that I lightened.
 |  |  |
To finish the image, I did some final sharpening and added a simple border. The border was created by extending the canvas by about 10 pixels using a white background and then extending the canvas again about .15 inches using a black background.


1 comment:
Good Job! :)
Post a Comment